There are many ways in which we can customize CIMCO Editor to save time. Today, we are going to take a look at how we can streamline the addition of NC-Base data to your NC programs. The way we are going to accomplish this is by creating a custom macro in Editor. The beauty of a well designed macro is that by doing a little extra work in the beginning, it is possible to save exponential time going forward. This is true of all macros in all environments. Our macro will generate an input box asking the user to fill in their NC-Base database fields. For instance, if we were to generate a new NC program for a new customer. This not only gives us the ability to organize as we go, but also leads to more uniform programs in general. So let’s get started.
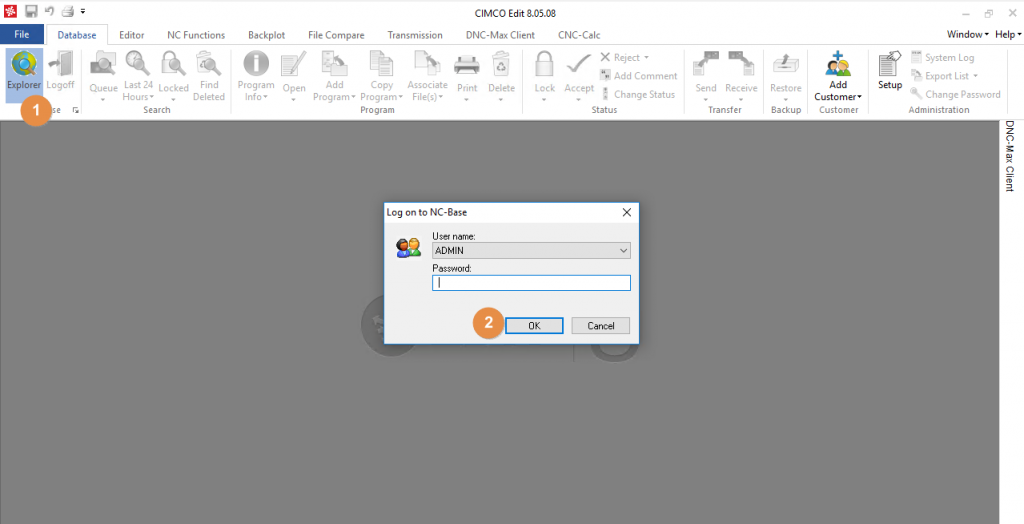
First we need to get the format template that NC-Base is looking for. To do that we need to open CIMCO Editor, click on the Explorer icon and log in to NC-Base as Administrator.
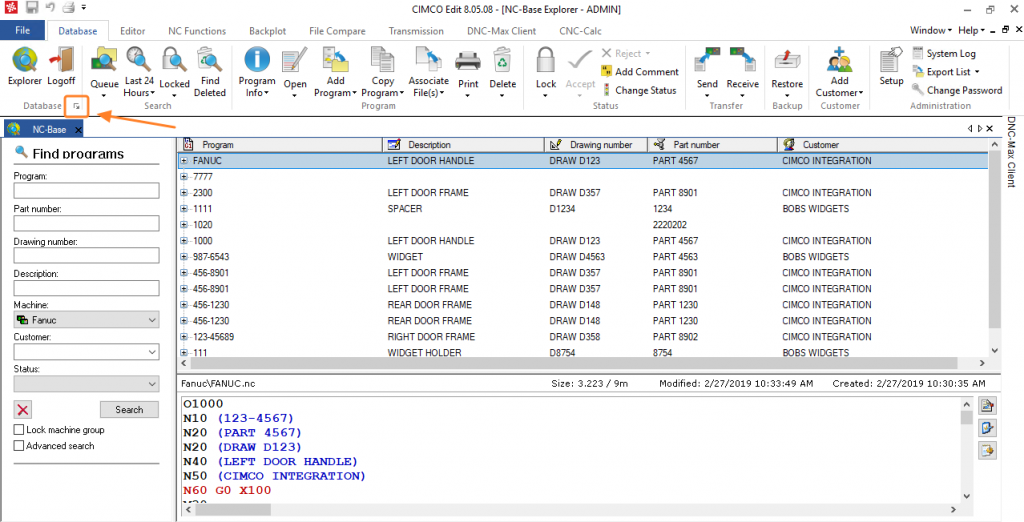
Once we are logged in, we need to access the configuration by clicking the square.
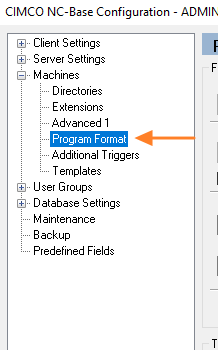
In the configuration window, we navigate to ‘Program Format’ by expanding ‘Machines’ in the left panel and selecting it.
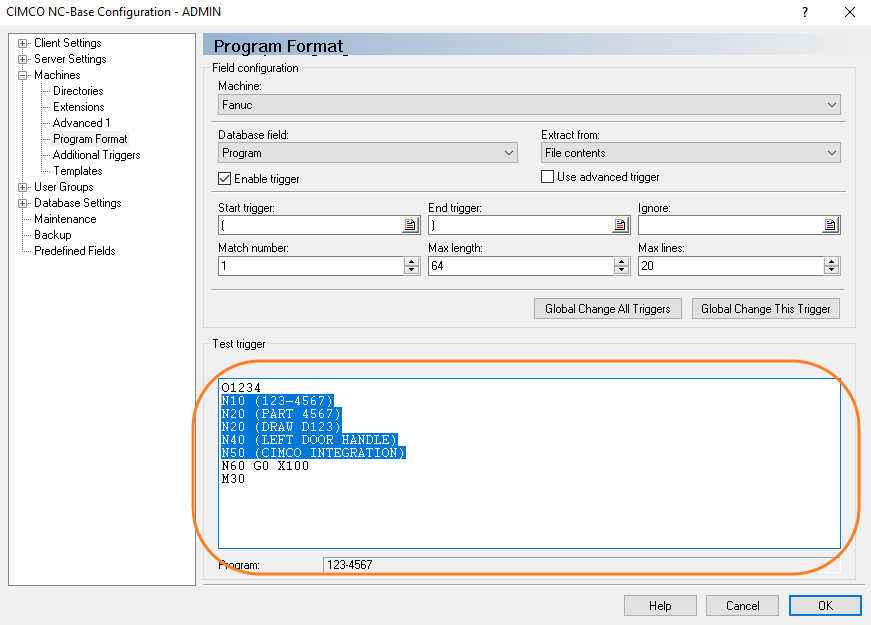
Next we need to select the sample data we want to add to our NC program and copy it to the clipboard.
Now that we have our sample, we can close the configuration window. Since we didn’t make any changes the best practice here is to click the cancel button.

Now we are going to click the ‘NC Functions’ tab and select ‘Macro Setup’ from the ribbon.
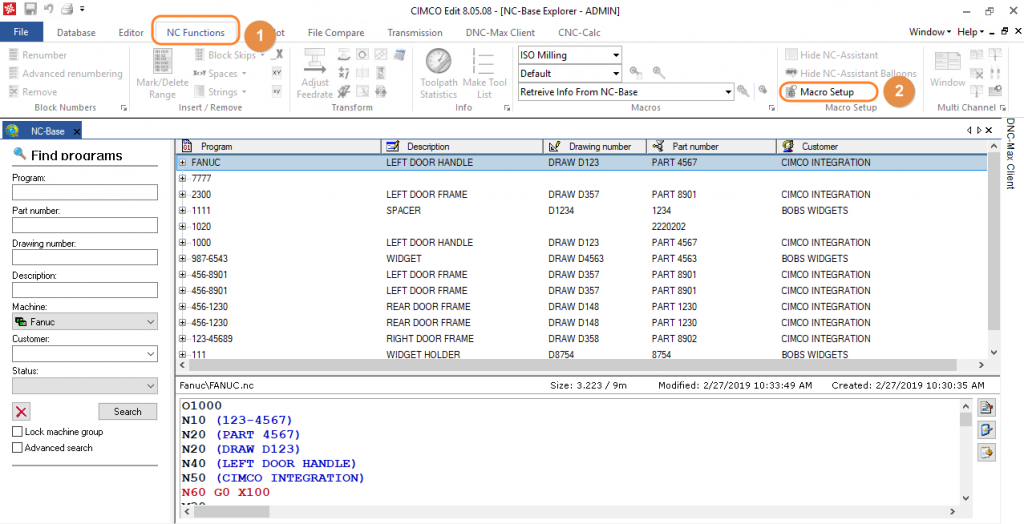
We are now looking at one of my personal favorite screens in CIMCO Editor, the Macro Setup screen. As the saying goes, “Where the magic happens.”
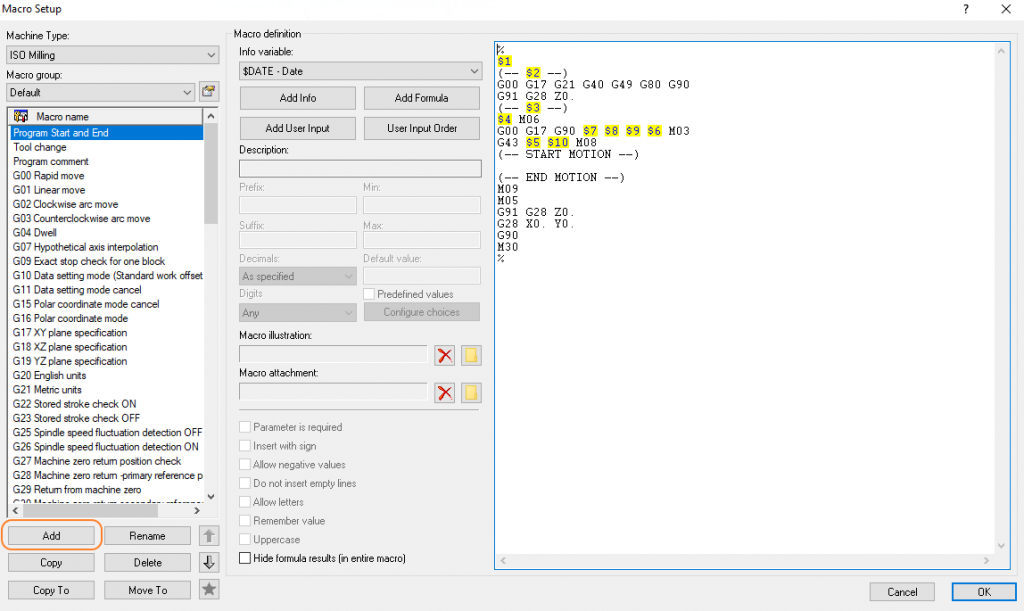
What we want to do is click the ‘Add’ button in the lower left.
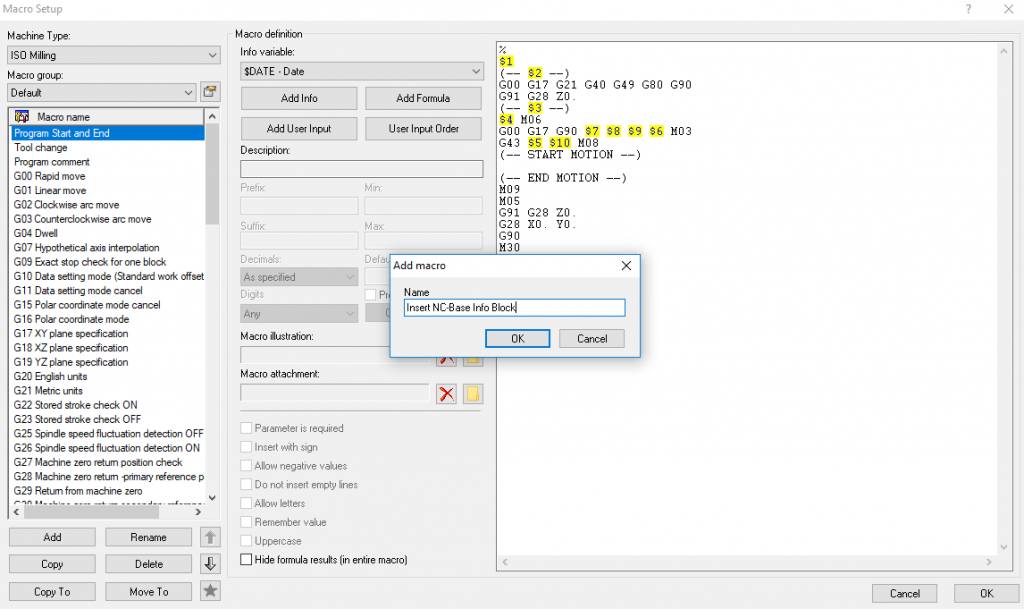
Give our new macro a name and click ‘OK’
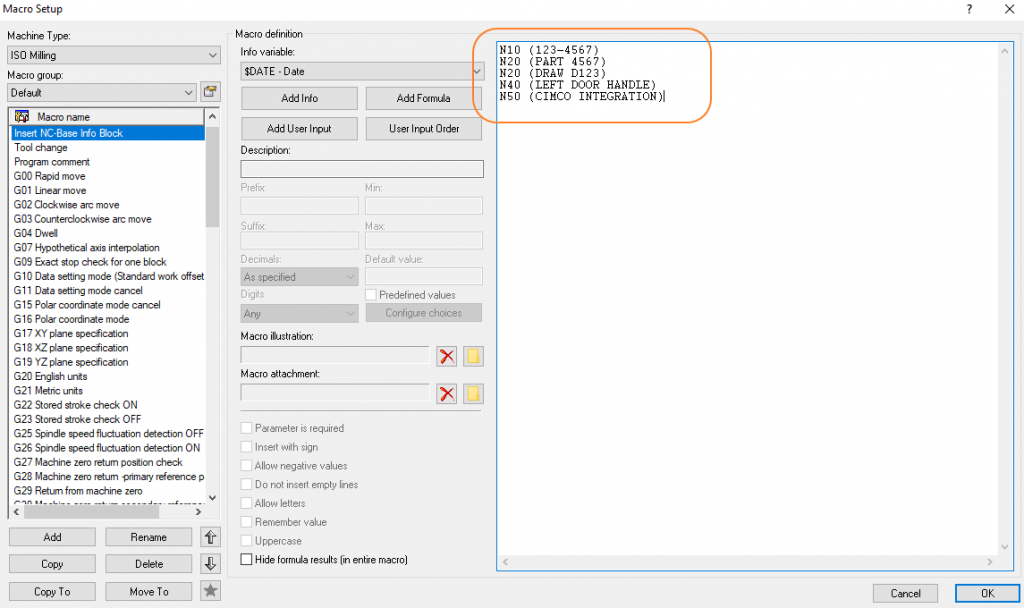
The next step is to paste our sample program data into the box on the right. This will become our macro, one variable at a time.
It is time to convert our fields into User input variables. We need to delete the first field (between the first set of parenthesis). With the cursor between the parenthesis, click the ‘Add User Input’ button.

As you can see, the software automatically creates the variable which we now need to define. I used the program number as my first field, so I put that in the description box. You have an optional checkbox to make the parameter mandatory if preferred.

-+[*WARNING*]+-
If left blank, empty comments will be created in the program for data entry later.
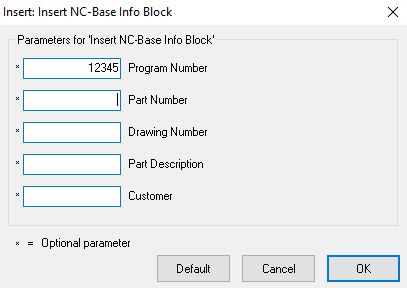
We then need to repeat this for each data field in our sample. In my example, my drawing number also has a letter in it so we have to be sure to check the box that allows letters. This allows the field to use characters other than 0-9.

We will of course need to check that box for the description and customer fields as well. Once that is complete, click ‘OK’.

Congratulations, You just made your first macro in CIMCO Editor. Now we just need to test it. Open your NC program in Editor. My NC-Base configuration looks at the first line after the ‘O’ number so that is where I will add my info block. The goal is to match the ‘Test Trigger’ we copied from the configuration. Add a line to your program and double click your brand new macro from the list on the left.
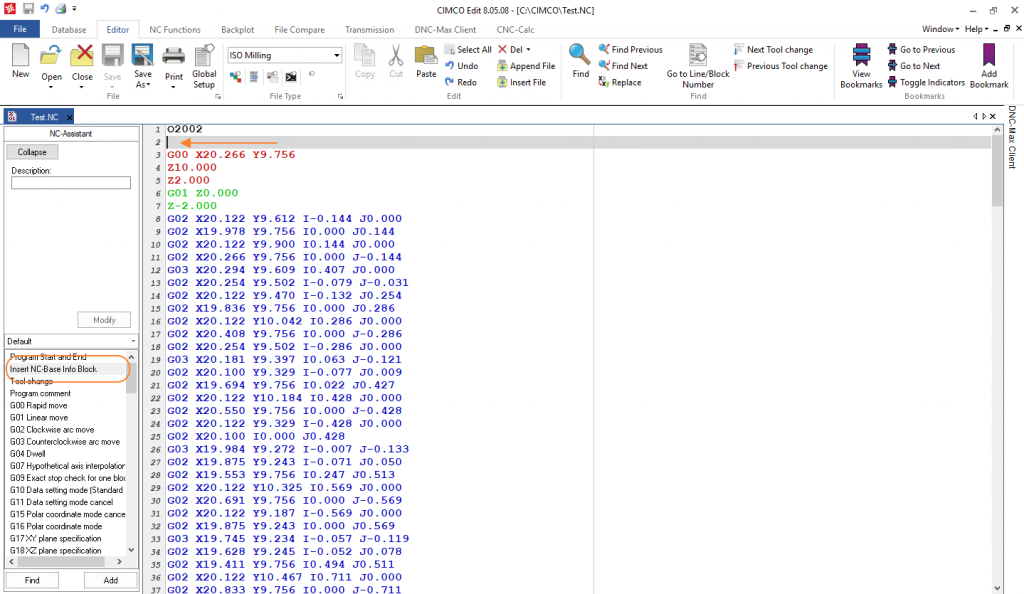
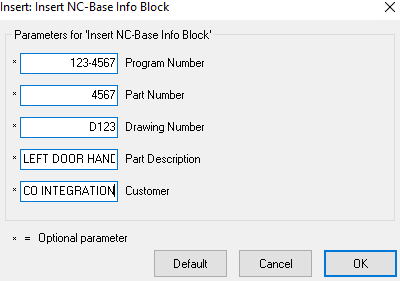
Here is your custom made Input box asking for the info you setup.
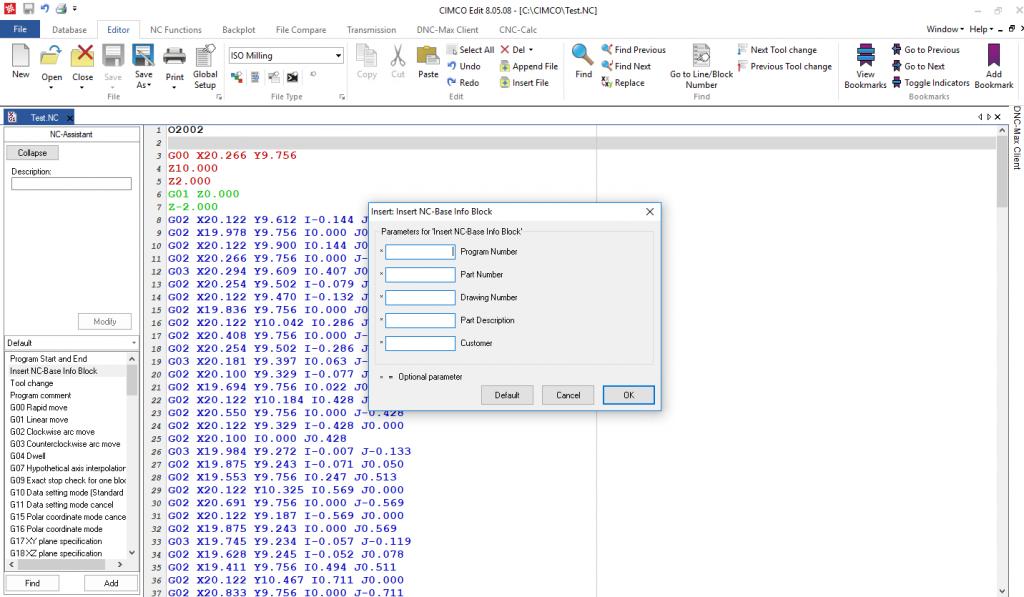
Just fill in the fields and click ‘OK’.
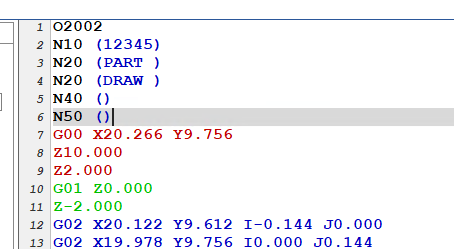
As you can see, our info block is inserted into our NC program in the same format as our test trigger.
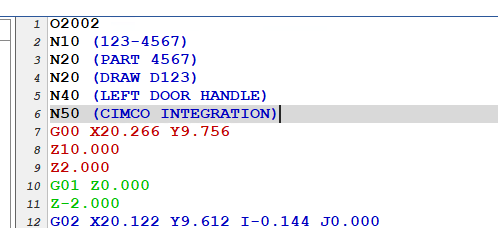
There we have it. Now we can just add a line, double click, add info and done. Once our info block is added to our program, NC-Base will extract it to the correct data fields automatically. It is ready to import. Just like that, We have added our database information once and let NC-Base populate it into the database for us instead of typing it manually into both the database and the NC program. Of course, it occurred to me as I was writing this macro there might be a need to go the other direction. What if we had an existing program and wanted to update the info block from the database? No problem! We covered that in Save time with CIMCO Editor Macros Part 2 – NC File Standardization.
Great. Well documented.
Thank you Deepak, I think Kevin did a great job. He is currently working on another article related to MDC that I believe you will appreciate.
[…] for the program information to add to our NC-Base database. If you missed part one, you can find it here. Today we’ll look at how we can use the same approach to update the NC file header […]