CIMCO Manufacturing Data Management does a great job of storing and controlling all of your manufacturing data. CIMCO Machine Data Collection does a great job tracking all of your machine metrics. They both also include a complete report system that can be customized and accessed via their respective clients. As is often the case, sometimes you may want to include some of this data in other reports, or just access it without having an MDM or MDC client installed or running. These are situations where Microsoft Excel is a useful tool. Here is a sample of some MDM data accessed via Excel, you’ll be able to access this and more using the process described in this tech tip:
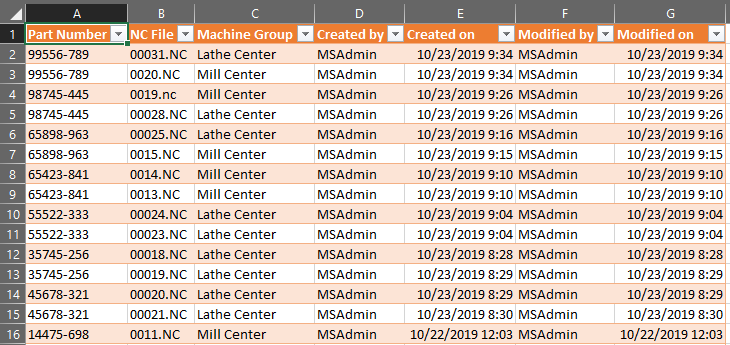
In today’s tech tip we show the process for using ODBC Connector to pull data from our database into Excel. We will cover the entire installation procedure for Connector as well as setting up the connection to the database. Once it is set up, we will be able to pull data directly from the database into Excel. In this example, we will be creating a report in Excel 365 by pulling the contents of a custom view that is already set up in the database.
Downloading MySQL ODBC Connector
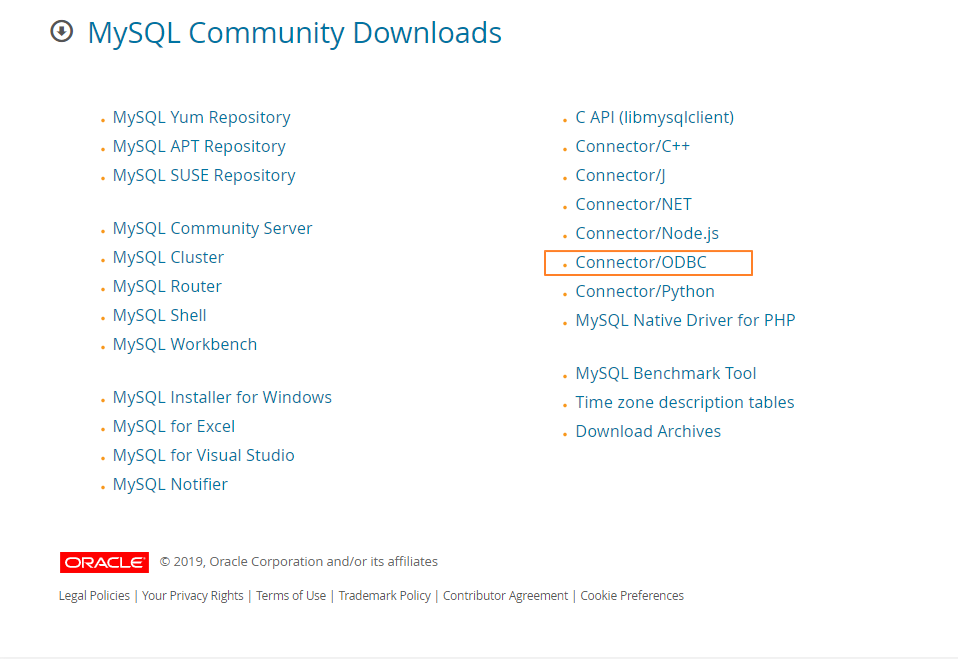
We are going to be using the ODBC Connector from MySQL. If we go to dev.mysql.com/downloads, we can select Connector/ODBC.
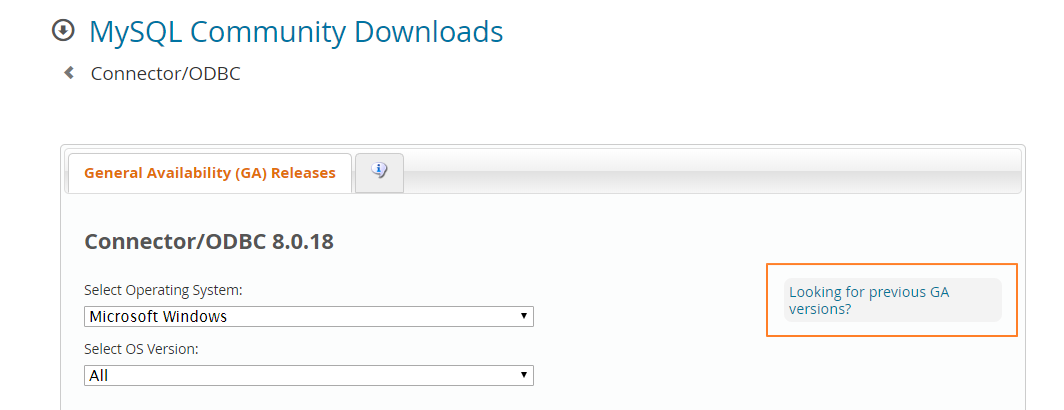
On the next page, we want to click ‘Looking for previous GA versions?’.
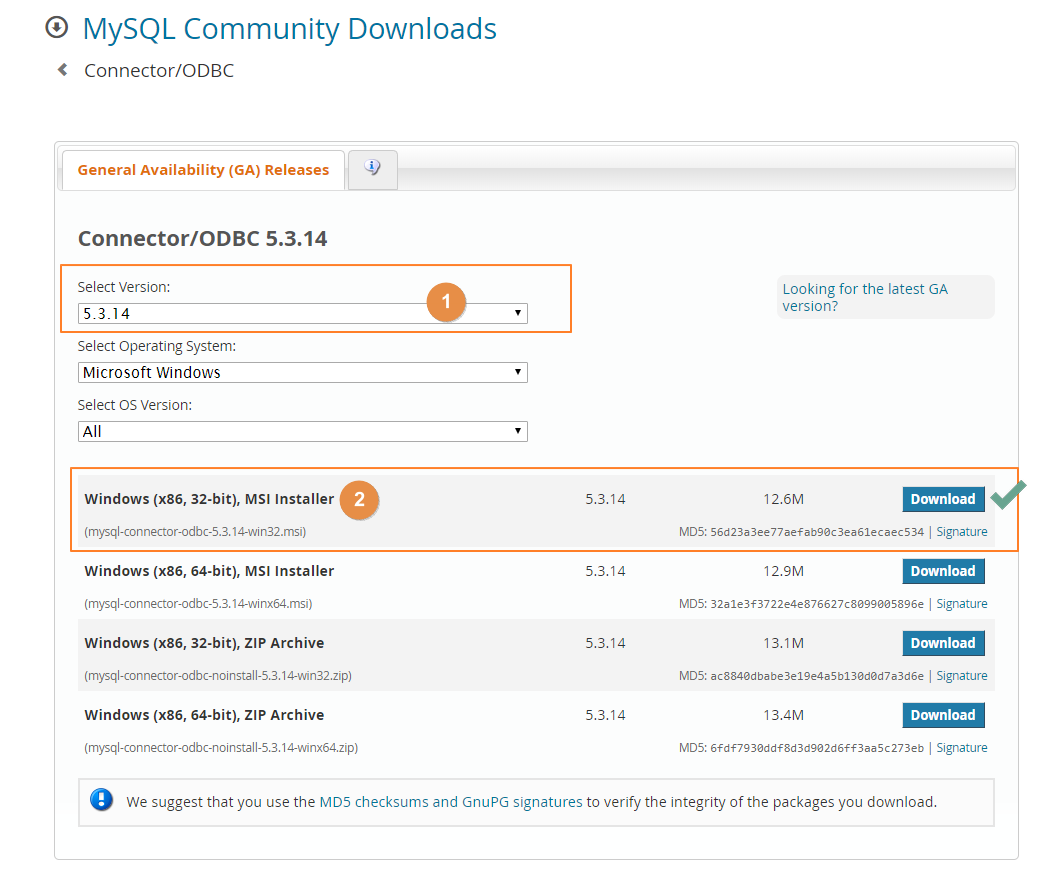
First, we need to make sure that the selected version is 5.3.14. Then we want to locate the 32-bit Installer in the list. Click download for the installer.
At this point, we have the option to sign up for a free Oracle web account. We are going to click on ‘No thanks, just start my download.’
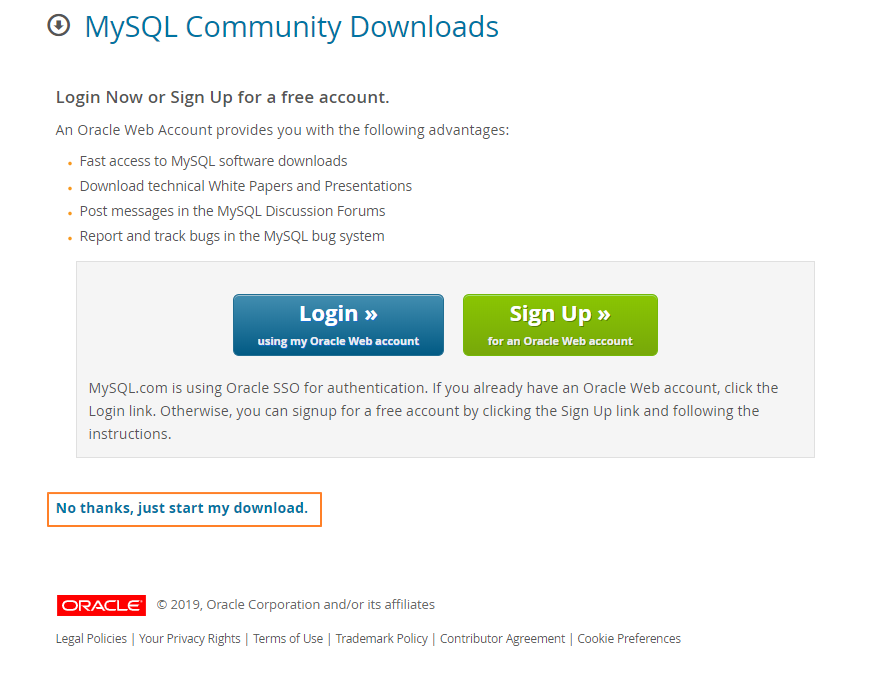
Select a save location and save so that we can install it in the next step.
Installing MySQL Connector
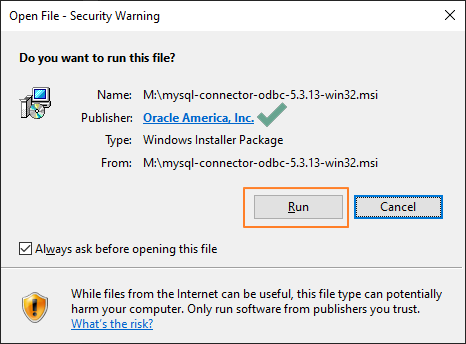
Now that we have downloaded the MSI installer, we want to run it. When presented with a security pop-up, it is always a good idea to verify the publisher on anything you download from the internet. Once we do, we can click ‘Run’
In the setup wizard, click next to get to the license agreement.

We need to click the bullet for ‘I accept the terms in the license agreement’ and then click ‘Next’.

The setup type we want is ‘Typical’ (It should be selected by default). Click ‘Next’.

Now we want to verify our settings are correct and click ‘Install’.

When it’s done installing, we will need to click ‘Finish’ to exit the installer.

Configuring the ODBC Data Source
In Windows 10, you can use the taskbar search to find ‘ODBC Data Sources (32-bit)’. Click on it to open the data source administrator.

We need to click on the ‘Add’ button in the ‘User DSN’ tab.

We want to scroll down and select ‘MySQL ODBC 5.3 Unicode Driver’ from the list. Once it’s highlighted, click ‘Finish’.

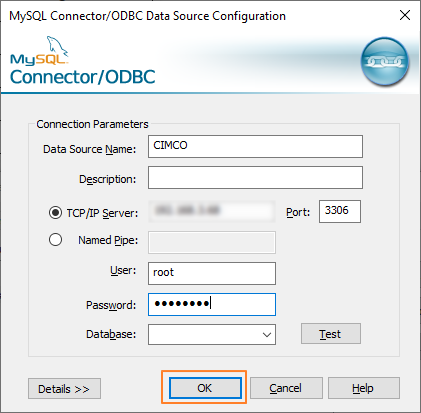
We need to give our new data source a Name. We also need to input the IP address, user name, and password of the database. (Consult your network administrator for the correct information for these fields.)

Once we enter the connection details, we can click on ‘Test’ to make sure that we can connect to the database.

We should get a pop-up box that shows the test result. Click ‘Ok’ to dismiss.

Click ‘OK’ to close the configuration window.
Now we can see our data source listed in the window.

Adding Data to Excel from the ODBC Data Source
In Microsoft Excel (Office 365 shown), We want to click on the ‘Data’ tab in the ribbon.

On the Data tab, we want to click ‘Get Data’, then ‘From Other Sources’, and then ‘From ODBC’.

Alternatively, if we right-click on ‘From ODBC’ in the menu, we can add it to the quick access bar to save us some clicks in the future.

Now we can see it in the quick access toolbar at the top of the window.

When we click on ‘From ODBC’, we get a pop-up that allows us to pick our data source. Select CIMCO and click ‘OK’.

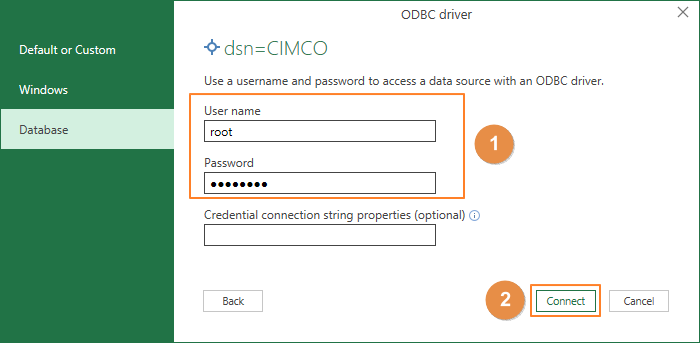
If we didn’t enter a username and password while setting up the connection, we will be prompted for it. Enter them here and click ‘Connect’.
In the Navigator, we will select the data that we want to import. CIMCO MDM is in the database called ‘ncbase’. Click the arrow to expand it.

We will be selecting a custom view that was created for this example, but we could select any table we want. When we click on ‘ncfilereport’, we will see a preview of the data to be imported. Click ‘Load’ to import it into our spreadsheet.

Now we can see that our data has been imported as a table that we can manipulate in Excel.

Taking it a Step Further
Now that we have the connection to the database set up, we can pull any information from it that we want. In an effort to keep it simple, we pulled NC-File data from MDM using a custom view that already existed in our sample database. This view provided a good set of data that was pre-formatted by the view to be easy to digest. We also have the option to pull an entire table from MDM or MDC. The downside of this is that we get all the data in the table with the original column headers. All of our data must then be parsed and manipulated in Excel every time we pull data from the database. By creating a custom view to pull into Excel, we have the ability to pull from multiple tables into a single view, in whichever order makes sense, and with user-friendly column headers like our result above. While it does take a reasonable amount of experience with SQL queries to create a custom view, it makes sense to invest the resources upfront to save time formatting down the road. Especially if we intend to run reports on a regular basis.