Managed Solutions

Your Smart Manufacturing Partner

  • About
  • Contact
  • Solutions
    • CIMCO Software
    • Services Overview
    • Shop Floor Security
  • Gemba
  • Blog
  • Support
  • Advocacy

Updating Your Keyfile on the CIMCO License Server (Offline Activation)

November 21, 2024 by Kevin Payne

Today we will explain how to update your CIMCO software license file on the CIMCO license server. This is Article 2 in a 2-part series explaining the offline activation process. If the server being updated has internet access, please click to view Article 1 which covers online activation.

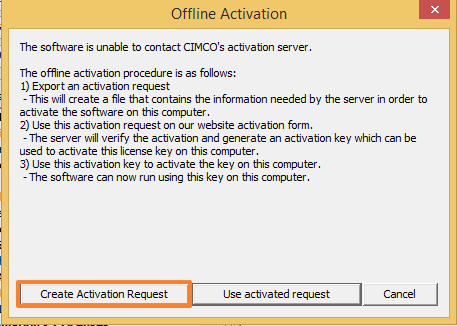
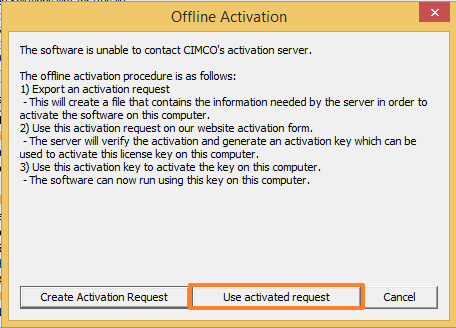
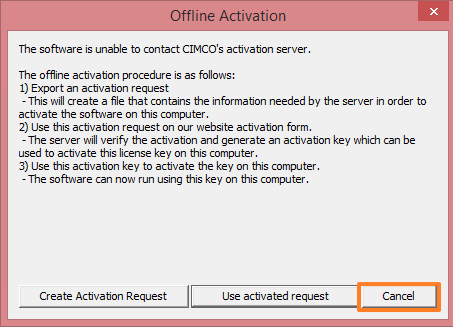
While not difficult, the offline activation does take more time. There are two parts to this process. First is activation of the keyfile and second is application of the activated keyfile.

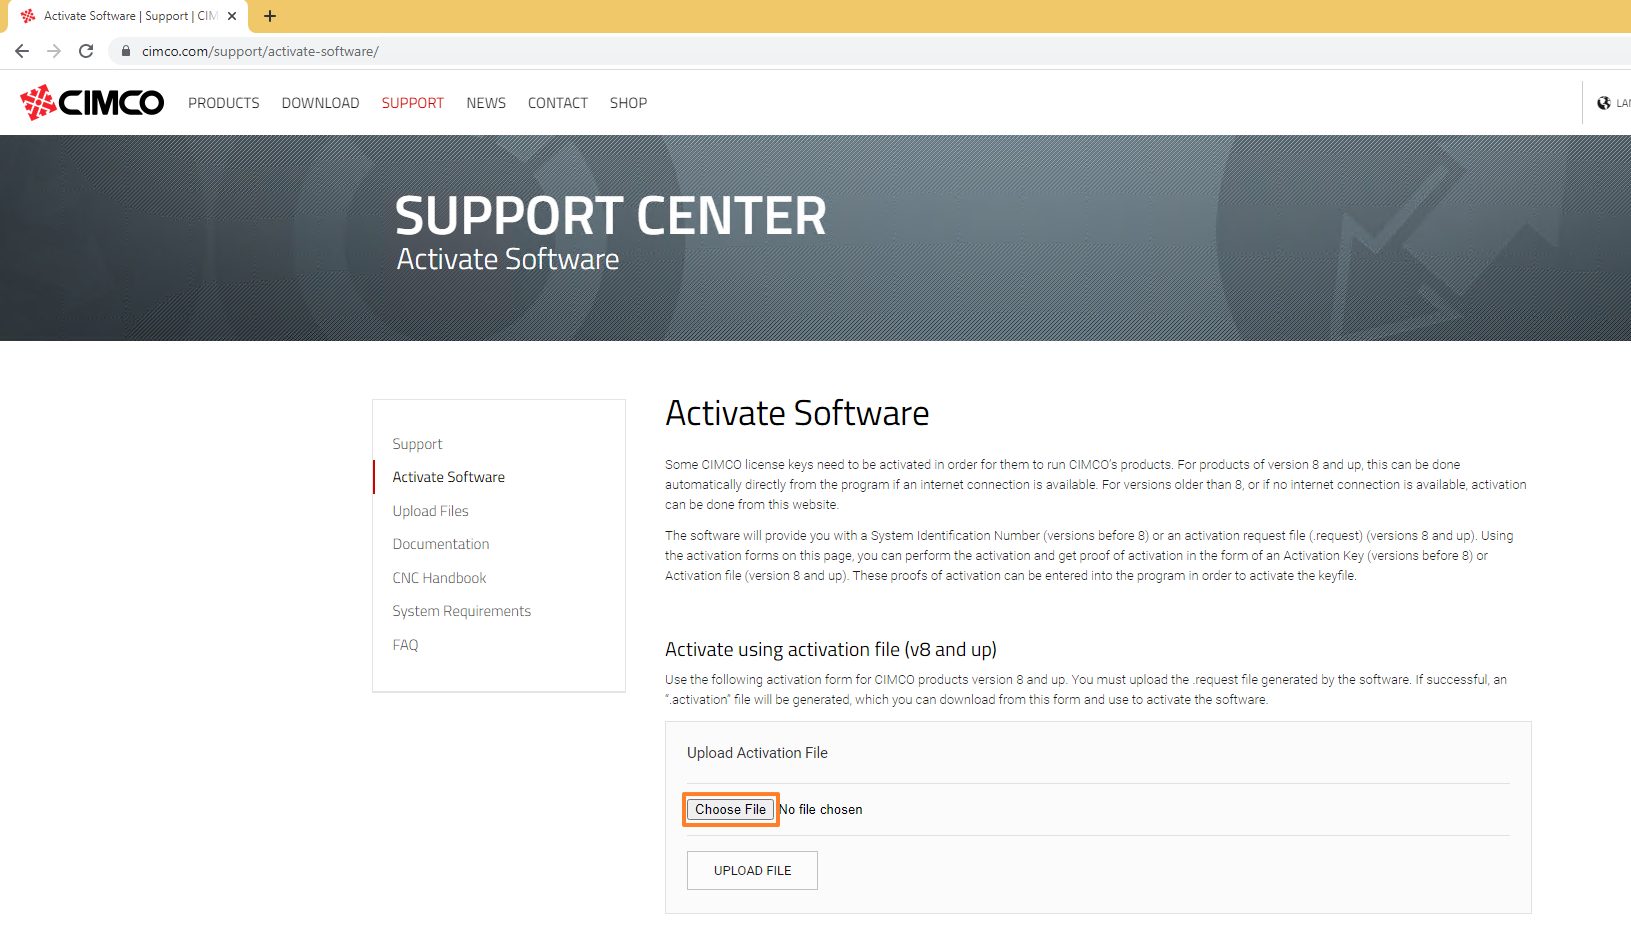
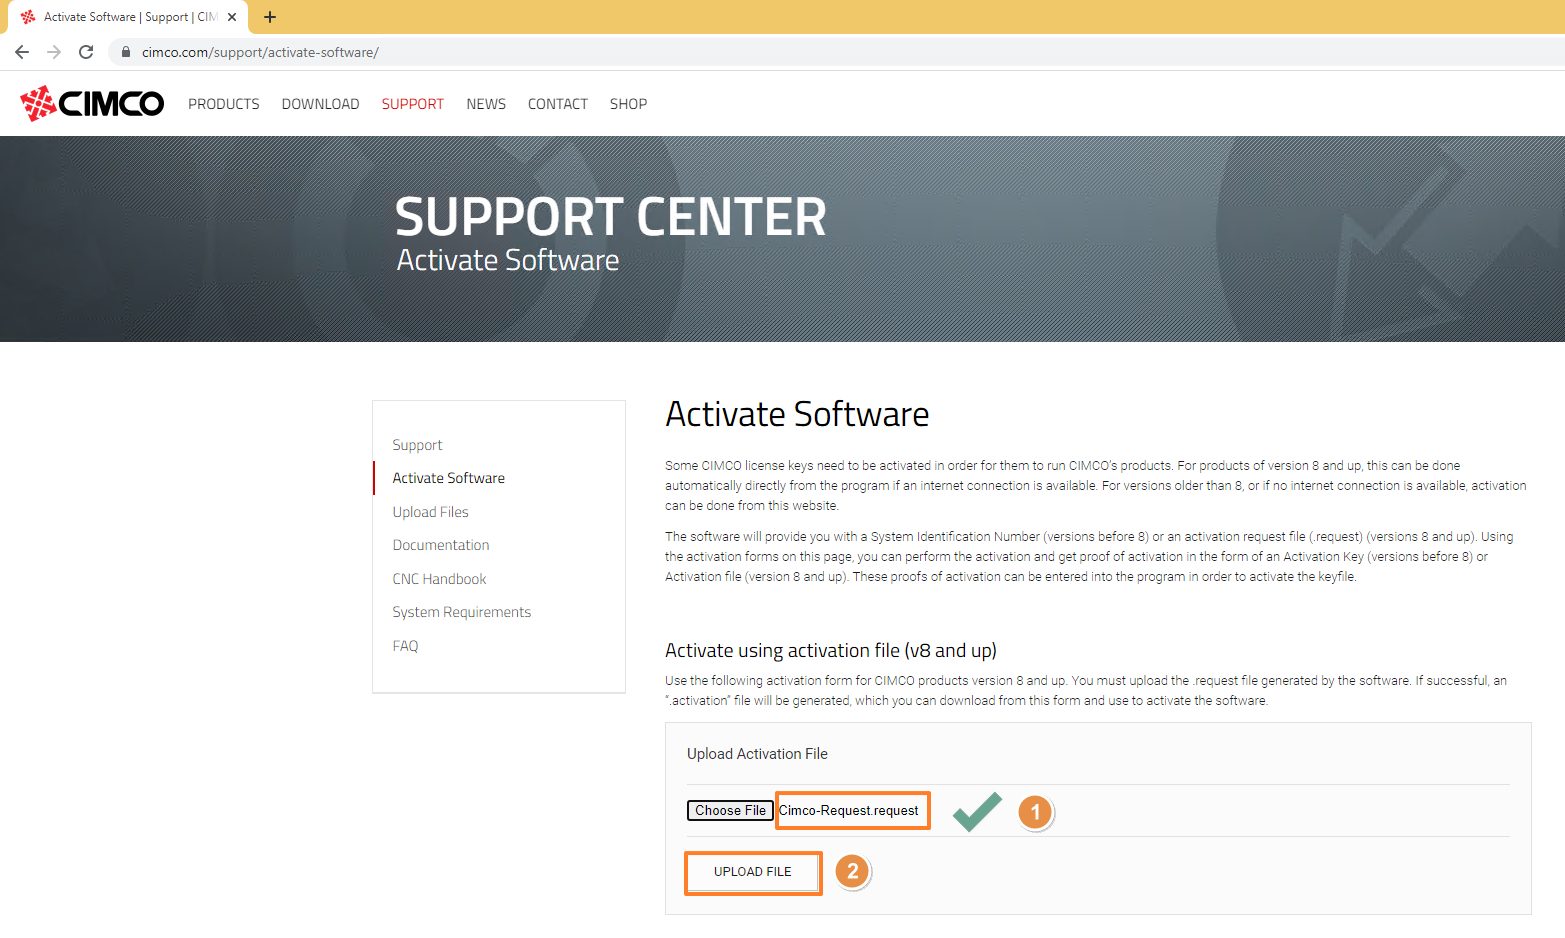
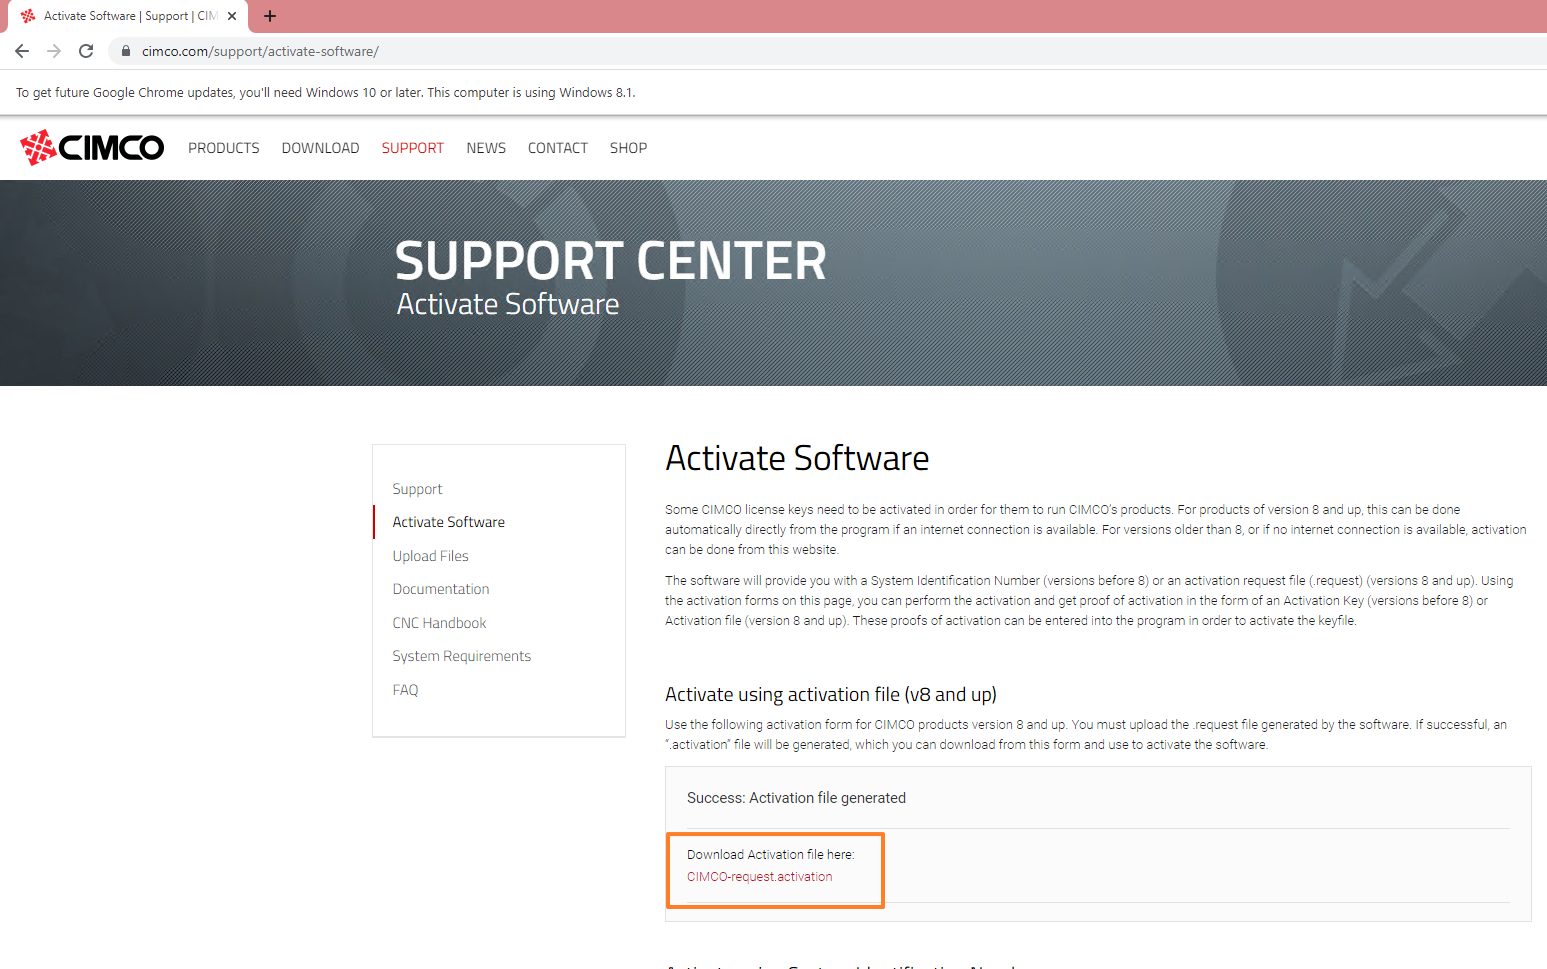
Section 1: Offline Activation of Your License File

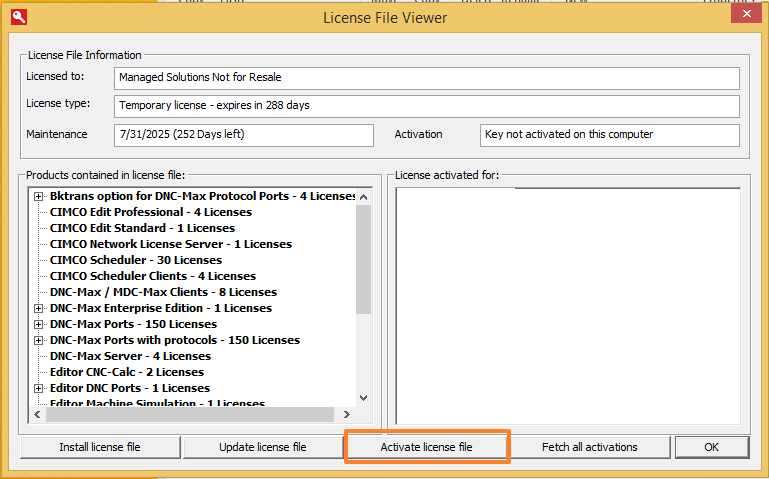
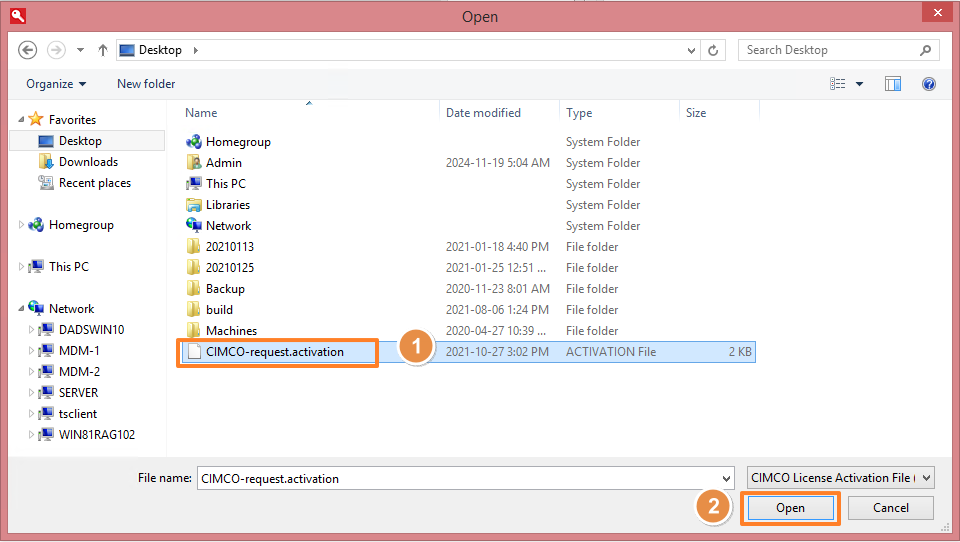
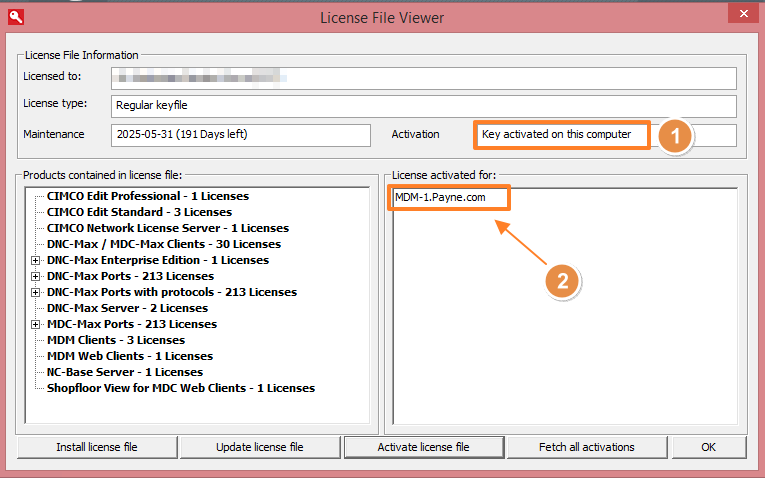
  1. Open the license file, then click on “Activate license file”.
2. Click on “Create Activation Request”.
3. Name the request file (1) and click “Save” (2).
4. Go to the Cimco.com website . In the top menu, click on “SUPPORT” (1), then click on “ACTIVATE SOFTWARE” (2) in the dropdown menu.
5. Click on “Choose File” under ‘Activate using activation file (v8 and up)’.
6. Select the file created in Step 3 (1), then click on “UPLOAD FILE” (2).
7. CIMCO will process the request and provide an activation file to download.
8. Back in the Offline Activation window, click on “Use activated request”.
9. Select the activation file downloaded in step 7 (1), then click on “Open” (2).
10. Click “Cancel” in the Offline Activation window.
11. In the License File Viewer window, in the “Activation” box you should see the text “Key activated on this computer” (1) and the server name should be listed under “License activated for:” (2).

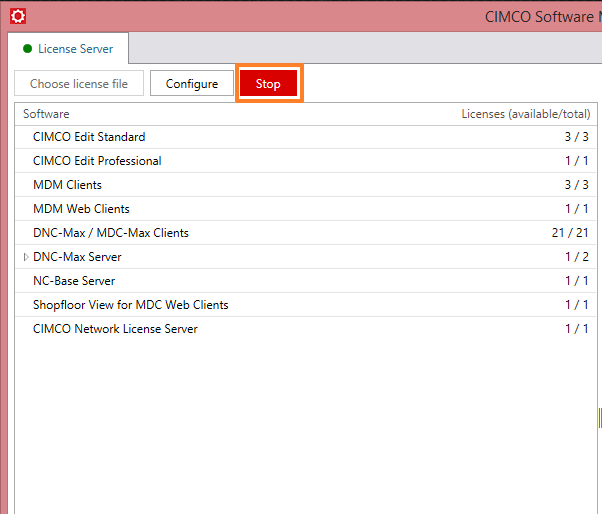
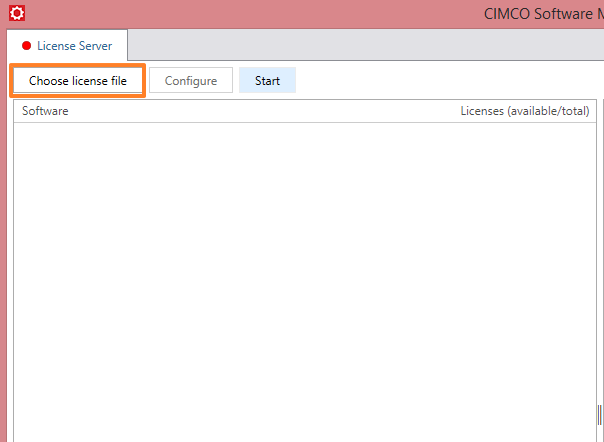
Section 2: Changing the Active License File in CIMCO Software Manager

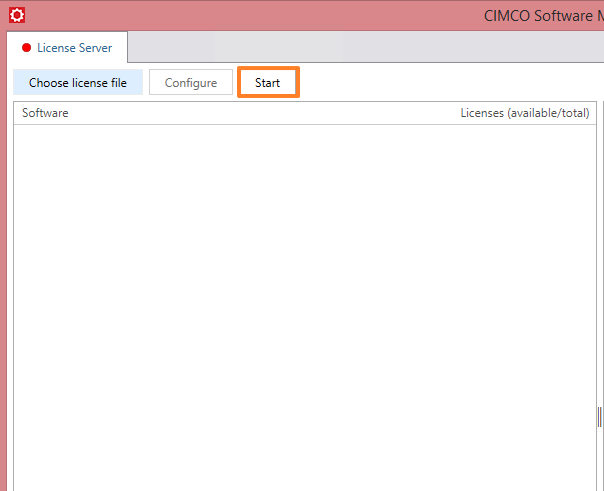
  1. In CIMCO Software Manager, click on “Stop”.
2. Click “Choose license file” and navigate to the license file activated in Section 1 above. (It is recommended to store the license file in the root CIMCO folder to make it easy to find if support is needed.)
3. Click on “Start” to start the License Server using the new license.
4. Verify the License Server started successfully.

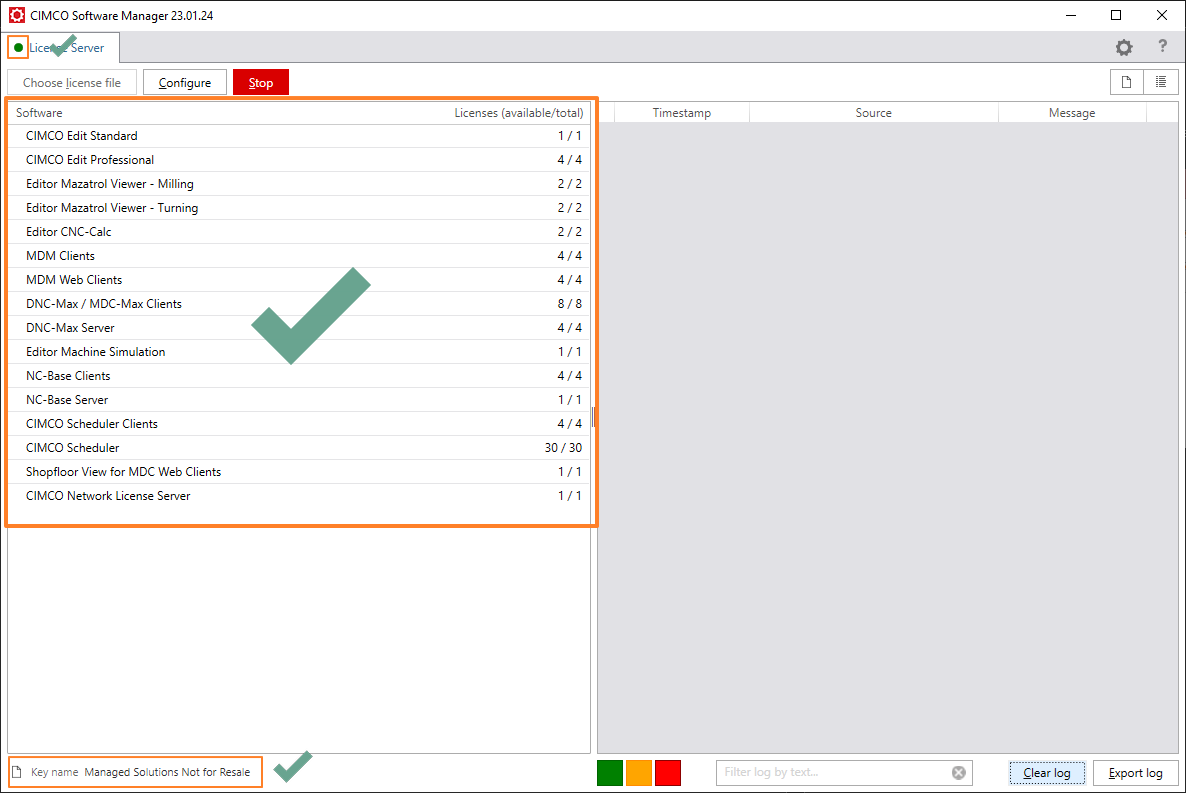
You Are Ready to Proceed

The License Server is now updated and users will have access to all benefits associated with CIMCO software maintenance. The goal of this article is to create a place of reference for this information when it is time to update the keyfile once again. Throw a bookmark on it and you’re good to go for future updating.

If you still need help feel free to contact us at 925-272-0384 or through our support page for assistance.

Tweet
Share
Pin
Share

Filed Under: CIMCO Tagged With: CIMCO License Server, CIMCO Software Manager, How To

About Kevin Payne

Kevin Payne is a CNC Automation Specialist who joined Managed Solutions in February of 2019. He has 18 years experience on the shop floor, 12 of them running CNCs and EDMs making injection molds of mil-spec parts. Kevin is an active learner with both Windows and CISCO infrastructure experience. He joined Managed Solutions after seeking an opportunity that would allow him to use more of his capabilities as well as challenge him with learning new skills.


CIMCO Demo Download

Start your free 30 day Demo of CIMCO Products Now


Join our Community

  • This field is hidden when viewing the form


Follow or interact with Managed Solutions at:

  • Facebook
  • LinkedIn
  • RSS
  • Twitter
  • YouTube

CIMCO Authorized Reseller


Copyright © 1997-2025 Managed Solutions Inc.